 This article describes how to deploy “3CXMyPhoneDesktopComponents” via Group Policy Management Console in Windows Server 2008.
Prerequisites
Each client computer must have the following applications installed:
- Windows installer 4.5 or higher
- Microsoft .NET Framework 4 Extended (FULL)
- Microsoft Silverlight
- Visual Studio Tools for Office 2003/2007/2010. More information on VSTO installations can be found below in the ‘VSTO Installation’ section
- The client computer must be joined to a Domain
Creating the Group Policy
Step 1: Create a share on a location in your network.
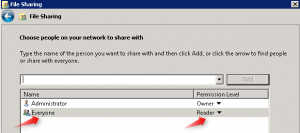
Create a folder on a computer that is accessible from all your computers in your network. Right click on this folder, and select Properties Sharing and click on the “Share…” button.
Type “Everyone” into the text box and click on ‘Add’. This will allow the rights for everyone to READ contents in this folder. In this folder, create another folder named “Desktop Components”.
Step 2: Prepare the MSI files
Download the following MSI’s for X64 and X86 versions and place them in the folder you just created, namely “Desktop Components”.
Download 3CX MyPhone Desktop Components X64
Download 3CX MyPhone Desktop Components X86
In this example our share will be located in the following location: \dc08ClientBinDesktop Components
Step 3: Organizational Groups
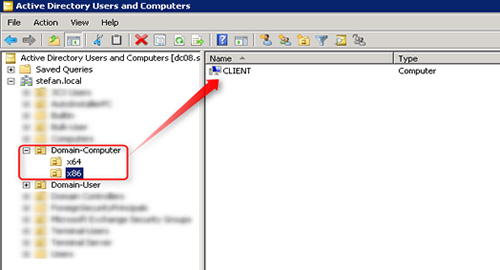
Go to your Domain Controller and navigate to Administrative Tools Group Policy Management. In this article the client computer systems are separated into 2 “Organizational Groups” or OU’s, named x86 and x64.
Step 4: Right click on “Group Policy Objects” and select “New”.
Step 5: A new GPO dialog will be displayed. Enter ”3CX Desktop Components x86″ into the ‘Name’ field . This is the GPO for 32 bit installations. Create another new GPO and name it “3CX Desktop Components x64″. This will be the GPO assigned for 64 bit installations.
Step 6: Right click on each of the new GPO’s that have been created and select “Edit”. You will be presented with the Group Policy Management Editor Screen.
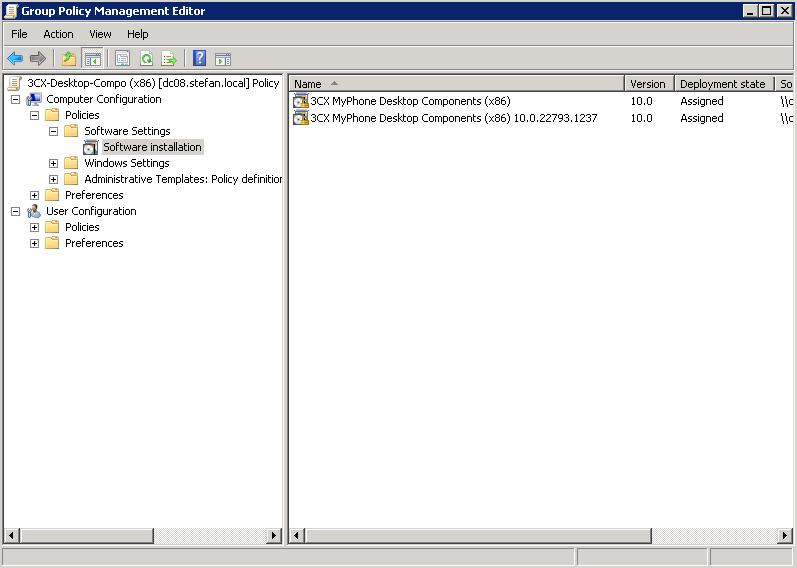
Step 7: Expand the following nodes: Computer Configuration Policies Software Settings Software installations. Right click on ‘Software Installations’ and select New Package. Enter the UNC path of the share you previously created and select the appropriate package that you want to deploy with this GPO. After you select the package you will be prompted to select the deployment method. Select “Assigned” as the deployment method.
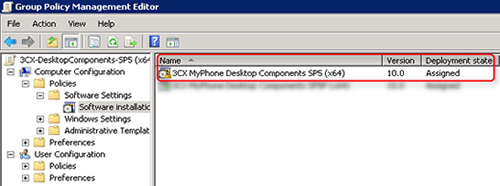
You will need to perform this procedure twice – one for the 32-bit package and another for the 64-bit package. You may close the Group Policy Management Editor once this has been completed.
Step 8: Linking Group Policy Objects
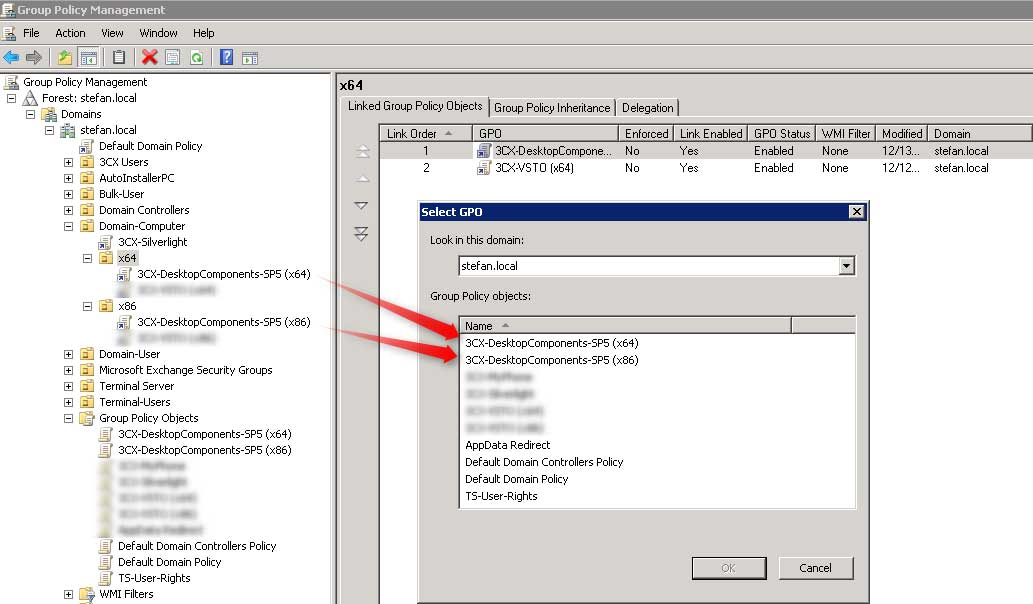
Click on Administrative Tools Group Policy Management Expand Domain Computer, right click on each OU and select “Link an Existing GPO”. Select the appropriate GPO to be linked with this OU.
Test the Update
To test this update do the following:
- Login to a computer that is joined to the domain.
- Open a command prompt.
- Type “gpupdate /force”. You should see an error message informing you that a restart is required because computer policies can only be applied after a restart of the computer.
- Type “Y” to Restart.
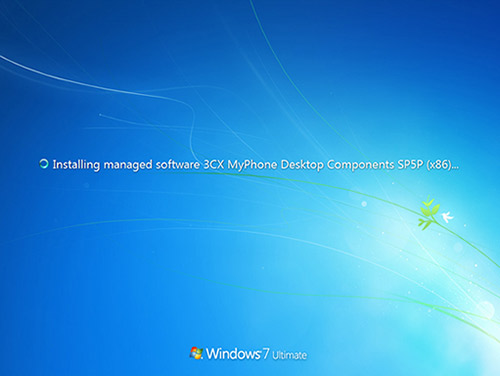
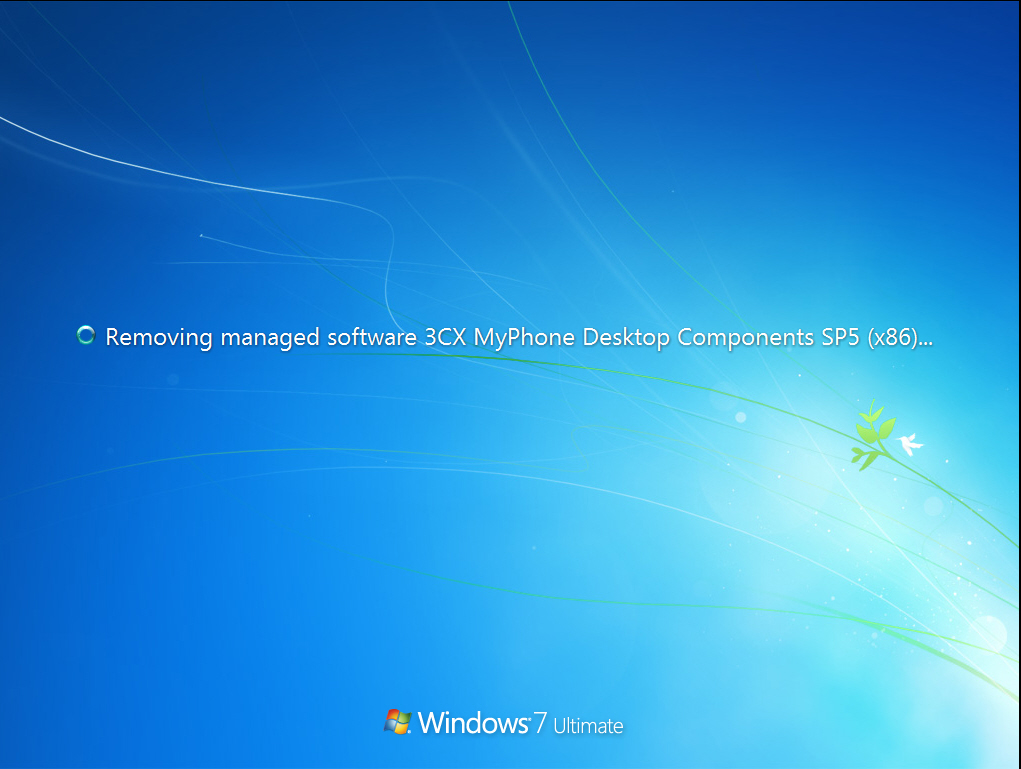
After the computer is restarted you will notice that the logging-in screen will change. After login, 3CX Desktop Components will be installed on this computer.
Updating 3CX Desktop Components via GPO
You can also update 3CX Desktop Components via the GPO’s. It is recommended to make an uninstall of the previous version and clean installation with the updated version.
With every service pack released, 3CX will also release 2 MSI download links for 32 and 64-bit versions of Desktop Components. These will be used for deployment via GPO Update.
Step1: Download the updated versions of 3CX Desktop Components for each architecture. Details on download links for both 32/64 bit msi installations will be provided in each service pack release. Put them in the same share created above.
Step2: Access the Group Policy Management Editor. Expand the following nodes: Computer Configuration Policies Software Settings Software installations. Right click on ‘Software Installations’ and select New Package. Enter the UNC path of the share you previously created and select the upgrade package that you want to deploy. Select “Assigned” as the deployment method.
At this stage you now have 2 GPO’s, one for the previous version and another for the upgrade version.
Step3: Configuring a GPO as an Upgrade to another GPO
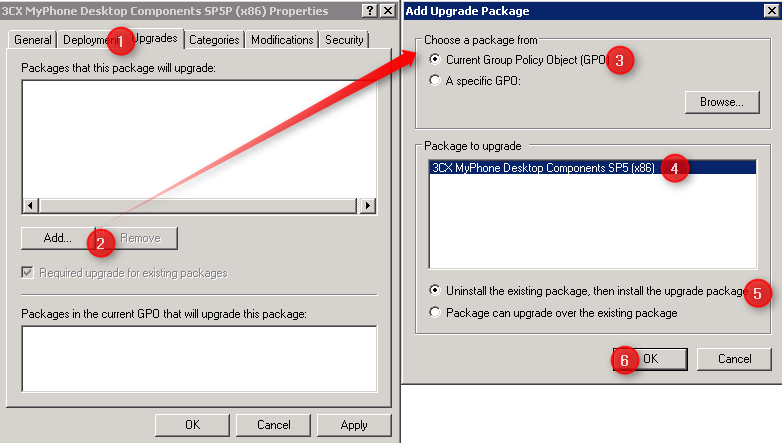
- Right click on the GPO that contains the Upgraded version of 3CX Desktop Components and click on Properties.
- Click on the “Upgrades” Tab and click the “Add…” button.
- Select the “Current Group Policy Object (GPO)” radio button.
- The GPO will immediately detect that this is an Upgrade of the previous installation present in the previous GPO and display the GPO name in the Package to upgrade section.
- Select “Uninstall the existing package, then install the upgrade package” radio button.
- Click OK.
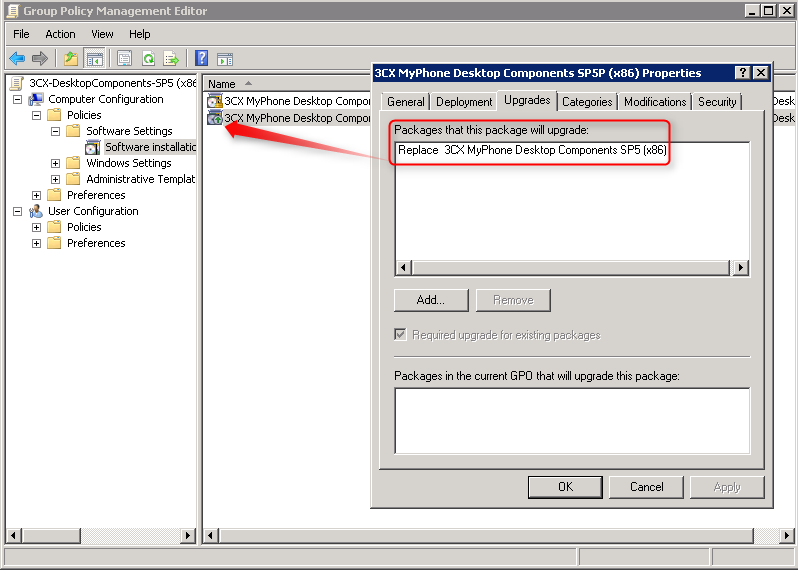
Step4: GPO is available for upgrading the 3CX Desktop components
You can easy identify that this GPO has been modified and contains an update. The icon near the GPO changes and you will see a green arrow pointing upwards. This indicates that this GPO has Upgrade functionality enabled.
Test the Update
To test this update do the following:
- Login to a computer that is joined to the domain.
- Open a command prompt.
- Type “gpupdate /force”. You should see an error message informing you that a restart is required because GP can only come into effect during computer login.
- Type “Y” to Restart.
You will notice that now the initial logging screen changes and you will notice that the old software will be uninstalled and the update will be applied afterwards.
VSTO Installation
VSTO – Visual Studio Tools for Office are required to be installed for the 3CX MyPhone Outlook plugin to communicate with Microsoft Outlook. There are 2 versions of VSTO.
- Visual Studio 2005 Tools for Office (vstor.exe) – Outlook 2003/2007
- Visual Studio 2010 Tools for Office (vstor40_x64.exe and vstor40_x86.exe). Outlook 2010 (32 and 64 bit)
If the client computers have Microsoft Outlook 2003 or 2007 installed you will need to install Visual Studio 2005 Tools for Office (vstor.exe).
If the client computers have Microsoft Outlook 2010 installed you will need to install Visual Studio 2010 Tools for Office (vstor40_x64.exe and vstor40_x86.exe).
Note for Microsoft Outlook 2010 Installed on 64 Bit Computers
Microsoft Outlook 2010 can be installed on 64 bit computers in 2 ways:
- 32 bit mode (under WOW) or
- 64 bit mode (natively)
If Microsoft Outlook 2010 is installed on 32 bit computers in 32 bit mode, you will need to install the 32-bit VSTO version: vstor40_x86.exe
If Microsoft Outlook 2010 is installed on 64 bit computers under wow (in 32 bit mode), you will need to install the 64-bit VSTO version: vstor40_x64.exe
If Microsoft Outlook 2010 is installed on 64 bit computers natively (in 64 bit mode), you will need to install the 64-bit VSTO version: vstor40_x64.exe

