Everyone has there little rituals they do when installing a fresh operating system of there choice. Here is mine.
Updates and Proprietary Drivers
When I have Installed a fresh copy of any Operating System the first thing I do is install any updates that are required.
You can either use the GUI Tool for this or as always the command line.
then
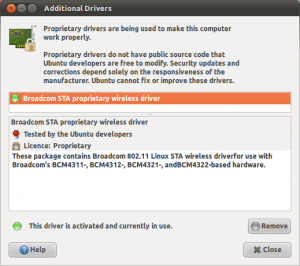
Once this has finished I head over to the Additional Drivers program and install any needed proprietary drivers.
Extra Needed Settings
I have a Packard Bell TK87 Laptop which uses the Intel Integrated HD GPU. The brightness function keys do not work on a fresh install so I have to edit some grub parameters.
To edit Grub I do
This will open the Grub configuration file. Grub is the initial boot selection software.
find the line GRUB_CMDLINE_LINUX=""
and change it to –
GRUB_CMDLINE_LINUX="quiet splash pcie_aspm=force i915.i915_enable_rc6=1 acpi_osi=Linux acpi_backlight=vendor"
Once you have done this you need to update Grub to take on the new settings.
then
Once you have rebooted you should now find that your brightness keys are working, again this might be specific to the i915 chip-set which my PB TK87 Uses.
Startup Applications
As I previously posted here, Ubuntu now auto hides some startup programs. I like to change what starts such as bluetooth daemon (My laptop has no bluetooth module) I don’t need this.
To unhide all of the applications that auto start do the following.
then
You should now be able to see all of the application entries via the “Startup applications” in the system cog menu.
Change that Cursor
This has been a bug for me in the past two releases of Ubuntu. When I use the GUI to change the cursor from DMZ-White to DMZ-Black it does nothing what so ever.
So I have resorted to doing it by hand, to do this you need to edit the index.theme like below.
Just change DMZ-White to DMZ-Black or whatever cursor you have installed. I like the plain black one
Changing Desktop Font
I like a nice small font for my desktop and gnome tweak tool doesn’t have the option of changing the size yet.
Just issue –
substitute Ubuntu 8 for the font and size you would like.
Eye Candy
Now for that eye candy goodness!
Everyone should have heard of the Faenza Icons by now. They are about the nicest looking Icons you can get. You have to install them via the PPA.
Like so –
then update and install
sudo apt-get install faenza-icon-theme
Spotify
I couldn’t live without this. It’s so much easier than clogging my hard drive up with MP3′s
The only downside of using Spotify’s native linux client is that you need a Spotify Premium account but I think it’s well worth it.
Firstly lets open up our apt sources list
now add this line to the bottom of the file
deb http://repository.spotify.com stable non-free
Now lets verify the packages by grabbing the key
Refresh APT’s cache
Install it!
This guide is just something I do that might help others.
Coming Soon – Smittix’ Top Applications
