Intro
If you are a web designer or developer the chances are you either have a VPS or a dedicated server and host a variaty of differant sites.
now, as you know, a website can only be found if you have A records and MX records etc, but what happens if your Name Server Fails and you can not look up clients websites or indeed your own….. What do you do?
Lookily most servers allow you to “clone” your websites “Zone” or records to other slave DNS servers so that, if one of your name servers fails clients can still find your clients websites and indeed your own.
You can get more information on your Name Server and if its set up correctly here IntoDNS this is a great free service that lets you instantly check out if your DNS is working correctly.
Setting up redundant DNS Servers & Prerequisites
First of all you are going to have to create A records that point to the slave servers in my case im just going to use example.com as a demo.
NS1.example.com A 1.1.1.1
NS2.example.com A 1.1.1.2
NS3.example.com A 1.1.1.3
You also want to add the above servers and IP addresses to you websites control panel in DNS options, other wise your provider will just return 1 DNS server and if its down you will not be able to resolve you website, you also want to make sure yo have a slave zone listed on all the other DNS Servers.
Windows Web Server Setup
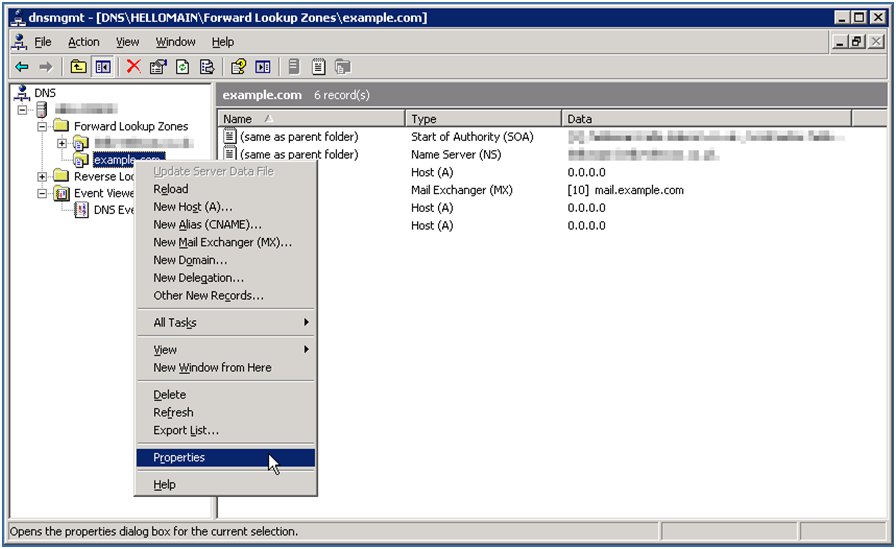
In Windows Web Server, Load up DNS, Right click on the domain you want to have a backup Name Server for and click on properties.

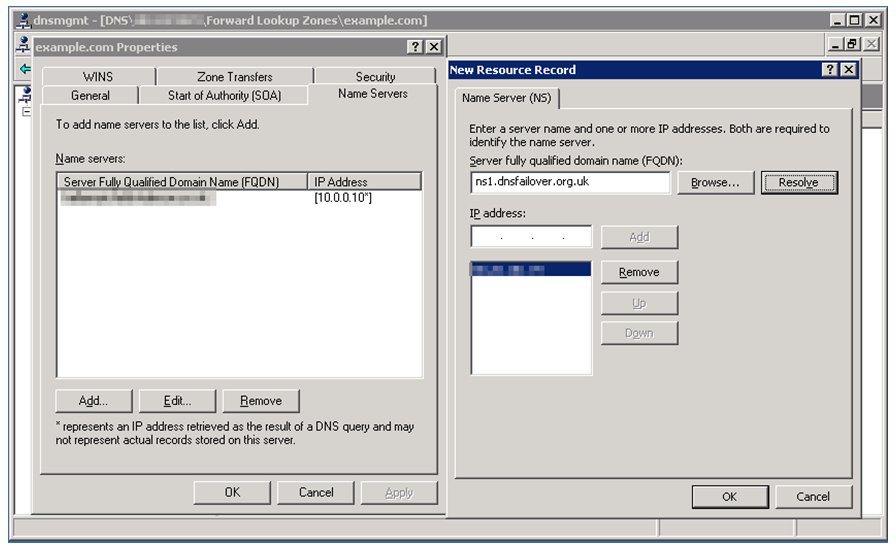
When properties loads click on Name Servers, click on Add, type in ns1.example.com, and click on resovle, do this for all example.com name servers, when done click on ok.

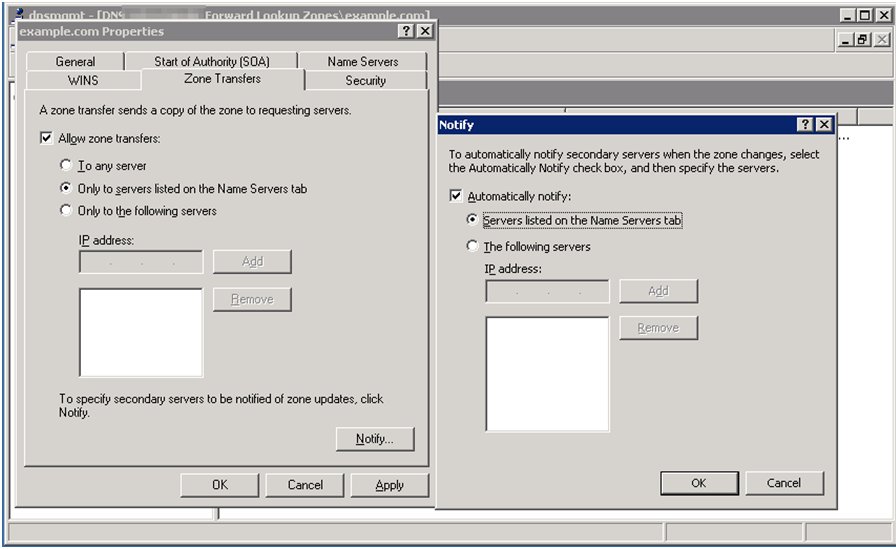
Click on Zone Transfers, put a tick in “Allow Zone Transfers” and put a dot in “only to listed servers on name servers tab”, then click on notify, put a tick in “Automatically notify”, and put a dot in “servers listed on the name servers tab”, click on ok, click on apply, click on ok.
repeat the above for all servers you have and you now see all of example.com’s name servers listed in the name column, if everything went well you can open CMD type in nslookup <Press Enter>
server ns3.example.com <Press Enter>
set type=any<Press Enter>
enter you domain name and you should see it list all the MX, NS servers.
If you need more information on the above or get stuck please contact me on my contact page.
