Starting with firmware version 8.4.27, all Snom firmware versions for Snom 370, 8xx and 7×0 include the ability to build secure VoIP-Infrastructures via OpenVPN-Technology: in this post I will show step-by-step how to configure a Snom 720 to connect to an Asterisk pbx installed on CentOs 5.2.
The first step is to upgrade the firmware to the latest version. After this it is suggested to disable auto provisioning.
In order to disable auto provisioning the settings are located under Advanced -> Update. Set Update Policy to “Never update, do not load settings”. Set Subscribe Config and “PnP Config:” to off.
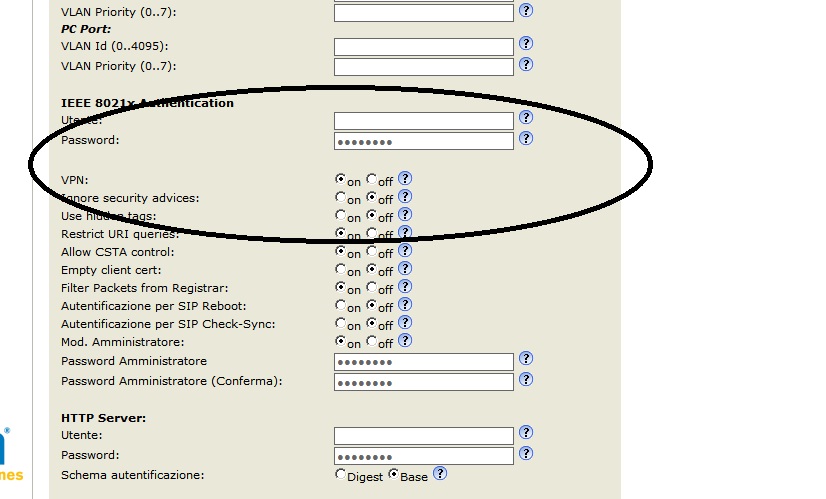
Now we have to enable the VPN by going to Advanced -> QoS/Security and selecting on, then reboot.
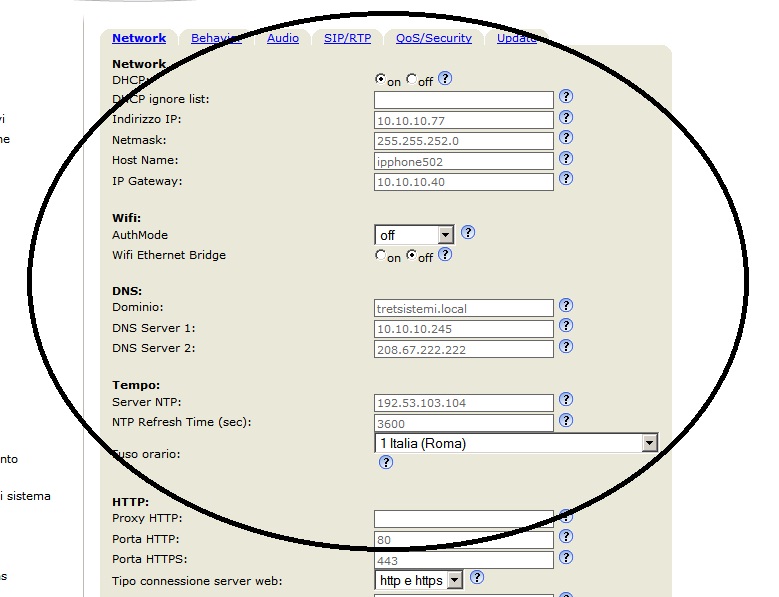
Now it is important verify all the configurations related the network and NTP (time server): all MUST be perfect !
Now on the server you have to install openvpn server and generate certificates for the clients. In the next some notes about this using the “distro” Pbx In a Flash.
cd /root
wget http://openvpn.net/release/openvpn-2.0.9.tar.gz
wget http://openvpn.net/release/lzo-1.08-4.rf.src.rpm
yum install rpm-build -y
yum install autoconf.noarch -y
yum install zlib-devel -y
yum install pam-devel -y
yum install openssl-devel -y
rpmbuild --rebuild /root/lzo-1.08-4.rf.src.rpm
rpm -Uvh /usr/src/redhat/RPMS/i386/lzo-*.rpm
rpmbuild -tb /root/openvpn-2.0.9.tar.gz
rpm -Uvh --force /usr/src/redhat/RPMS/i386/openvpn-2.0.9-1.i386.rpm
cp -r /usr/share/doc/openvpn-2.0.9/easy-rsa/ /etc/openvpn/
cp /usr/share/doc/openvpn-2.0.9/sample-config-files/server.conf /etc/openvpn/
Now you have to edit /etc/openvpn/easy-rsa/2.0/vars, and the next fields.
KEY_COUNTRY=
KEY_PROVINCE=
KEY_CITY=
KEY_ORG=
KEY_EMAIL=
Save the file.
chkconfig openvpn on
cp -R /etc/openvpn/easy-rsa/2.0/* /etc/openvpn/easy-rsa/
cd /etc/openvpn/easy-rsa/
. ./vars
./clean-all
./build-ca
source vars
./build-dh
./build-key-server server
cp keys/ca.crt ../
cp keys/dh1024.pem ../
cp keys/server.key ../
cp keys/server.crt ../
cp /etc/openvpn/server.conf /etc/openvpn/server.conf.orig
sed 's/dev tap/;dev tap/' /etc/openvpn/server.conf > /etc/openvpn/server.conf.tmp
sed 's/;dev tun/dev tun/' /etc/openvpn/server.conf.tmp > /etc/openvpn/server.conf.tmp1; cp /etc/openvpn/server.conf.tmp1 /etc/openvpn/server.conf
service openvpn restart
Now you have to verify that iptables does not block the port 1194/UDP.
The server-side is installed of Open-Vpn: we have to create client certificates.
cp /etc/openvpn/easy-rsa/vars /etc/openvpn/easy-rsa/2.0/
cp /etc/openvpn/easy-rsa/keys/* /etc/openvpn/easy-rsa/2.0/keys/
cd /etc/openvpn/easy-rsa
source ./vars
./pkitool <unique name for the certificate>
Now we have the openvpn server installed and 1 certificate to use with Snom Phone: you have to copy in a separate directory these files.
ca.crt
<unique name for the certificate>.crt
<unique name for the certificate>.key
Oss.: You can find all these files in /tc/openvpn/easy-rsa/keys.
In this same directory you have to create a file named vpn.cnf
vpn.cnf
client
dev tun
proto udp
remote <public ip address of the pbx> 1194
resolv-retry infinite
nobind
persist-key
persist-tun
ca /openvpn/ca.crt
cert /openvpn/<unique name for the certificate>.crt
key /openvpn/<unique name for the certificate>.key
ns-cert-type server
verb 3
ping 10
ping-restart 60
Att.: You should not change the name vpn.cnf and the path /openvpn/ inside the file: all the files must be in the same directory.
Inside this directory you have to create the tar that contains all these files.
cd /etc/openvpn
chown -Rf root:root *
chmod -R 700 *
tar cvpf vpnclient.tar *
The created file vpnclient.tar must be copied inside a directory that is accessible from http. I.e. if you use Pbx In A Flash you can use /var/www/html/vpnclient (you have to create the dir vpnclient.
Now you have to return to the web interface of the phone. In Advanced -> QoS/Security now are visible the fields “Unzip VPN config tarball” and “Netcat Server”: you have to insert the http path to you file.
I.e. http://<public ip address>/vpnphone/vpnclient.tar
Save & reboot !
To debug the connection from the phone to vpn server you can use a netcat software activated in a different machine to obtain all the logs. I.e. in debian server to activate this server you can use the next line
netcat -l -p 5000
After this you in the Snom in the field ”Netcat Server” you have to insert the next.
<ipaddress of the debian server> 5000

